
Laser cutting machine
A laser cutter has a prolific number of use cases, from making sign boards to creating intricate designs. And its major advantage being the flexibility in the kind of materials that can be used such as: wood, acrylic, fabric, etc. The list of materials can be found here: http://epiloglaser.com/how-it-works/laser-material-compatibility.htm
The laser cutter being a really fascinating tool is equally dangerous and requires your full attention during its period of operation. A user must be present with the machine always while in operation as it is prone to catch fire while cutting materials like fabric or wood. Other materials like vinyl is strictly prohibited from the machine as it creates chlorine gas which is highly toxic and can cause you to turn blind. And take care to avoid opening the lid of the machine immediately after it cuts, since it releases harmful gases. Wait for the gases to be sucked by the exhaust chamber by waiting for a minute.
The kind of laser we are dealing with is CO2 as it offers the best bang for the buck and is called the Trotec Speedy100.
How it works?
The laser machine can do both cutting and engraving on materials by varying factors such as speed and power. For example, to cut and engrave a wood based material, following parameters can be used:
This machine removes the black portion of the design file and mainly identifies two colors:
The machine works just like a normal desktop printer. After installing the driver software, you would be able to cut a file just like how you would print a file from a word document.
Cutting and engraving a design
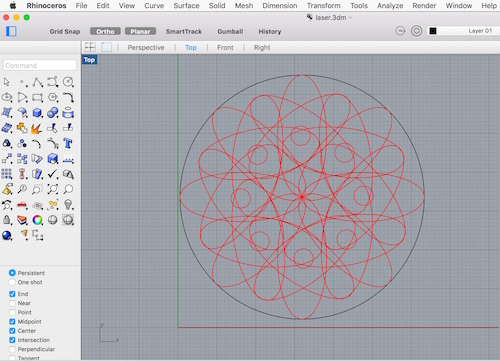
First, design a file using a software like Rhino in the exact dimensions you want the final product to be in. The color of the lines to be cut should be black and the ones to be engraved should be red. The file should look something like this:
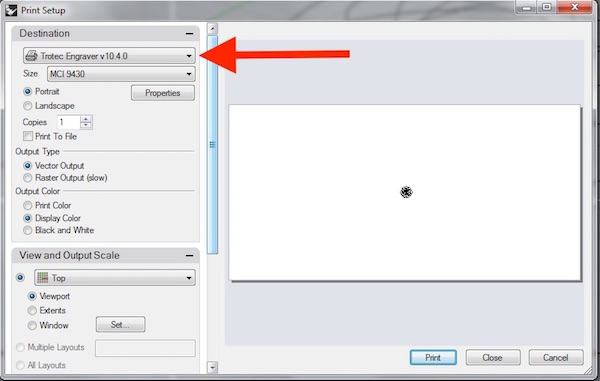
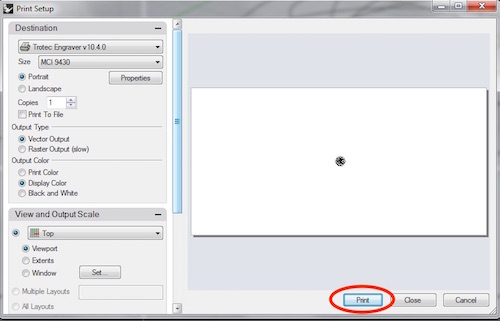
Next, press the print button shortcut (Ctrl + P) to open up the dialog box for the printer. Select the Trotec laser cutter from the machines list and make sure that the scale is 1:1 and the bed size is 600x300 from the Properties dialog.
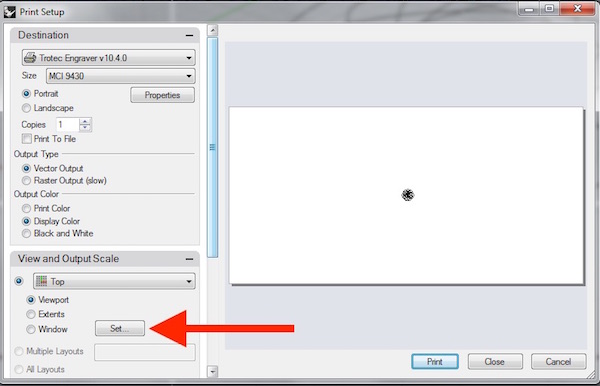
In order to find out the location of the design on the material, from the view and output scale, click on window set. Then set window over the design to place it on the required portion of the material.
Next, click on Properties and select Material Settings. Select the material as wood and make sure that the Black color is set to cut (with Power=90 and Speed=1.5). The parameter for speed is inverted, which means that greater the value of speed (1-100) slower it moves and lower the value, greater is the speed. The values for the power and speed need to be adjusted depending on the machine and is completely subjective to the machine.
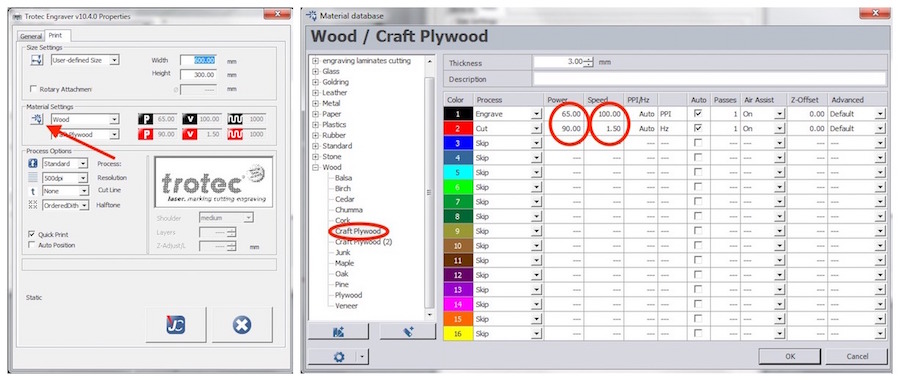
Similarly, for engraving the parameters should be Power=80 and Speed=10. Moreover, the values of these parameters will need to be adjusted over time as the machine gets used up and the efficiency of the laser decreases.
Next, fix the material (wooden sheet) on the bed using masking tape on the corners.
Now the Z axis height for the machine needs to be set. The X-Y origin is always the top left corner of the machine. In order to set the Z axis height, open the lid of the machine and take the metal positioning tool and hang it over the head of the machine as in the picture. Now switch ON the machine and slowly, press the UP button to lift the bed.

Continue to move it upwards in steps until it just touches the metal tool to have it fall down. Now the Z axis height is set for the machine.
Now you can click on the print button from the rhino software to have your machine cut the design file on the wooden sheet.
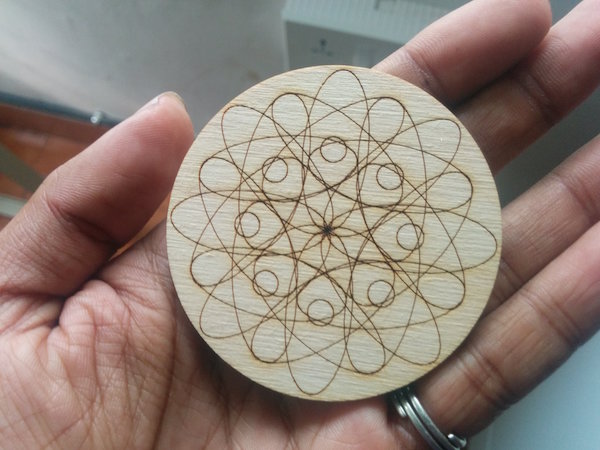
This is the product that I got out of the design file I fed to the machine:
Download files: laser.3dm